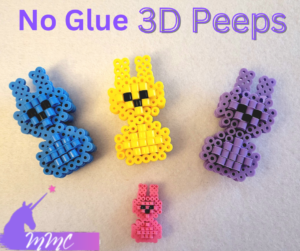
Spring is in the air, and that means it’s Peep season! Just in time for Easter, I decided to expand my Peep collection with something new and super fun—a 3D Perler Bead Peep pattern!
If you’ve been following along, you may have already seen my crochet Peeps—I have two adorable styles, including a mini version that fits perfectly inside plastic Easter eggs. I’ve also shared a pony bead Peep keychain design, and now I’m thrilled to add this Perler Bead Peep to the mix!
Why Peeps?
Peeps are a classic symbol of spring and Easter joy. Whether you’re a fan of eating them or simply love their cheerful look, there’s no denying they’re iconic! For me, crafting Peeps in different forms is more than just a seasonal project—it’s a calming, joyful way to express creativity and boost mental wellness.
Crafting has always been my personal escape. It brings me peace, purpose, and a whole lot of happiness—especially when I know what I’m making will bring someone else a smile. And let’s be real… as a multimedia crafter, I never get bored! With a room full of supplies and ideas, I could probably open my own craft shop (okay, maybe not quite yet—but close!).
About the 3D Perler Bead Peep
This fun and beginner-friendly 3D Perler bead project is perfect for Easter baskets, spring décor, or little handmade gifts. And yes—they fit inside medium plastic Easter eggs, which makes them even more magical for kids and candy-free Easter egg hunts!
Supplies You’ll Need:
- 249 Perler beads in your Peep color of choice (pastels work great!)
- 6 black Perler beads for the eyes
- Ironing paper and iron
- Pegboards
- Craft glue (optional for assembly)
Skill Level:
Beginner to intermediate – This project is great for crafters of all ages, especially those who are familiar with Perler bead basics and ready to try something 3D. It’s also a great screen-free activity for kids ages 8 and up (with adult supervision for the ironing part).
Whether you’re making one or a dozen, these Perler Peeps are a fun, festive, and heartfelt way to celebrate the season.
🌟 Tried this project? I’d love to see your creations! Leave a comment below or tag me on social media so we can spread some handmade spring joy. And don’t forget to subscribe on YouTube for more craft tutorials or join Patreon for exclusive projects, printables, and patterns. 🌟
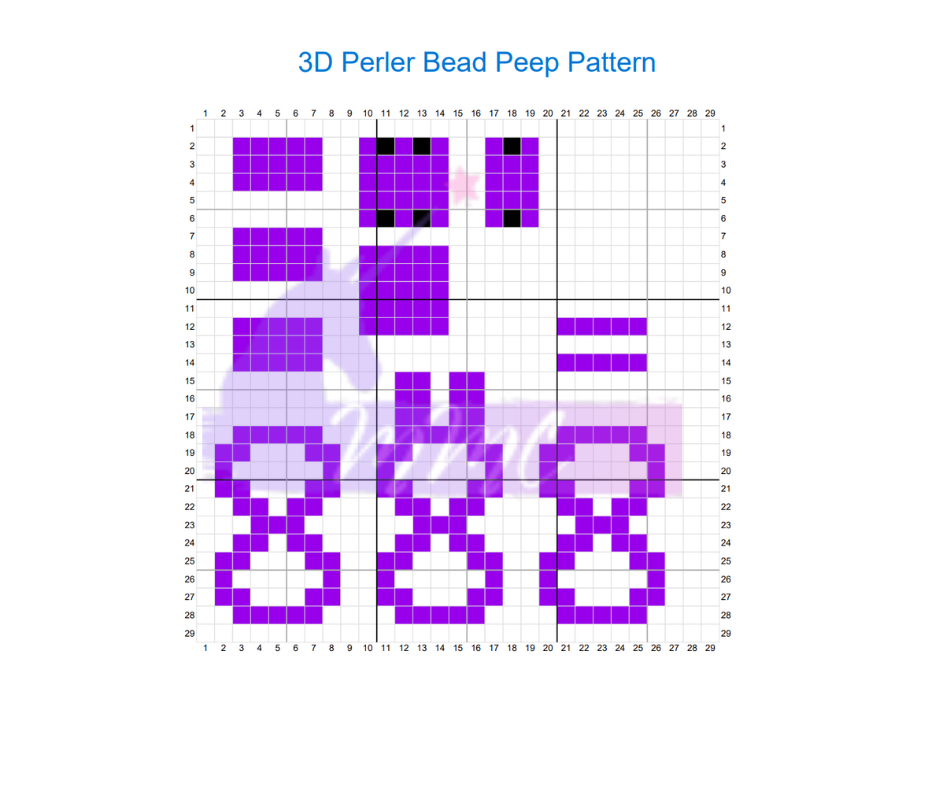
Set up: The middle bunny on the grid is the middle on the peep. They will be placed in the same order as in the grid.
Each peep has3,5,3,1 space which are rows 2,3,4, and 5. You will put corresponding piece of 3×5, 5×5,3×5,1×5 in those spaces. Keeping in mind Row 2 has the eyes and row 3 of the peep has the nose. You will then repeat on the bottom. I will be doing the set up on Instagram so make sure to follow in case you need to visually see it.
Feel free to make, sell the peeps you make using my pattern. All I ask is that you give me credit as designer and tag me on social media showing me all your adorable peeps and ideas on where you used them.
Skill Level:
Beginner to intermediate – This project is great for crafters of all ages, especially those who are familiar with Perler bead basics and ready to try something 3D. It’s also a great screen-free activity for kids ages 8 and up (with adult supervision for the ironing part).
Whether you’re making one or a dozen, these Perler Peeps are a fun, festive, and heartfelt way to celebrate the season.
🌟 Tried this project? I’d love to see your creations! Leave a comment below or tag me on social media so we can spread some handmade spring joy. And don’t forget to subscribe on YouTube for more craft tutorials or join Patreon for exclusive projects, printables, and pattern
Happy Crafting
Dayana💖