Looking for a colorful craft that’s fun, creative, and actually useful too? Today we’re making an adorable DIY Perler Bead Coin Box! This hands-on project is perfect for kids, tweens, and anyone who loves creating cute things with Perler beads.
You can design your box with fun colors, confetti patterns, emojis, or even your favorite characters. Once finished, it becomes the perfect little place to store coins, tiny treasures, stickers, or secret keepsakes!
What You’ll Need
- Perler beads
- Square pegboards
- Iron
- Parchment paper
- A heavy book or flat object
- Optional: Perler bead tweezers
- Printed grid paper for planning designs
How to Make a Perler Bead Coin Box
Step 1: Create the Sides of the Box
To make your coin box, you’ll need:
- Front piece
- Back piece
- Two side pieces
- Top piece
- Bottom piece
That’s six total pieces!
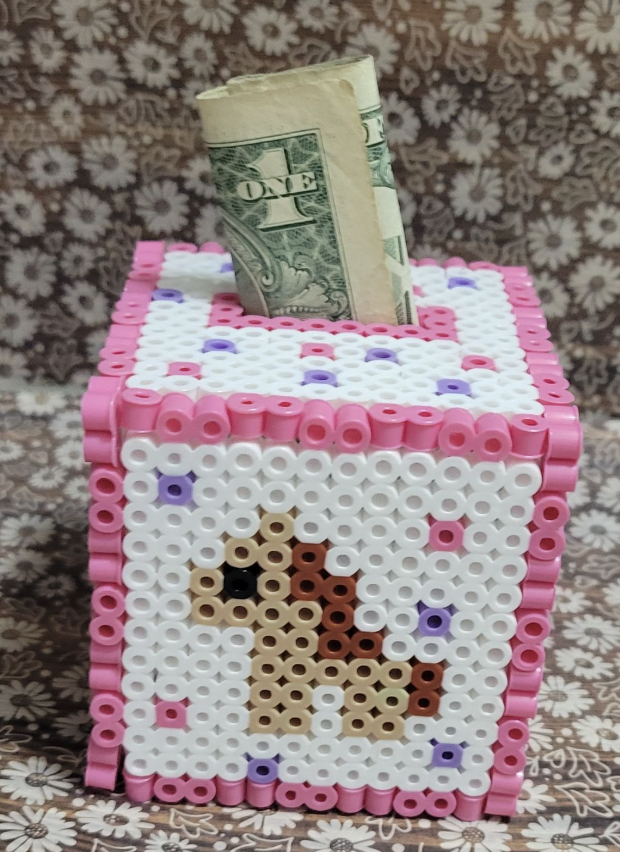
For this project, the center square was made 16 beads across and 16 beads down. The outside border makes the finished box 17 beads wide.
Don’t forget to leave a small slot on the top piece for coins!
Step 2: Add Your Colors & Design
Now comes the fun part — decorating!
Fill your design with your favorite bead colors. You can create:
- Rainbow patterns
- Confetti styles
- Emoji faces
- Character-inspired designs
- Cute pastel themes
Tip: Some crafters like using the Perler bead tweezers, but using your hands works great too!
Step 3: Make Matching Patterns
To help the box fit together properly:
- The top and bottom pieces should match
- The left and right sides should match
- The front and back should match
A repeating bead pattern around the edges helps the pieces connect neatly together.
Step 4: Iron the Pieces
Place parchment paper over your design and carefully iron in circular motions until the beads begin to melt together.
You’ll notice the beads start looking slightly transparent — that means they’re fusing correctly!
Carefully flip the design over and iron the other side too.
Step 5: Keep Everything Flat
While the pieces are still warm, place a heavy book or object on top for a few minutes. This helps prevent warping and keeps the pieces nice and flat.
Step 6: Assemble the Box
Once cooled, begin fitting the pieces together.
You can lightly iron the seams to help everything connect tightly. Make sure all the sides line up evenly before sealing the box.
If you want a fully closed keepsake box, simply fill in the coin slot area. If you want it to function as a coin bank, leave the slot open.
Fun Design Idea
Before building your box, sketch your design on grid paper first! This makes it easier to plan patterns, colors, and character designs before placing beads.
Why We Love This Craft
This DIY craft is:
- Great for creativity
- Perfect for fine motor skills
- Fun for rainy days
- A cute handmade gift idea
- Awesome for saving coins and tiny treasures
Every box turns out completely unique!
Final Thoughts
Perler bead crafts are such a fun way to mix creativity and building together. Whether you make a bright rainbow coin box, a cute emoji design, or a magical pastel creation, this project is sure to bring lots of smiles.
If you make one, I’d love to see it! Make sure to join our facebook community here to share your creations and see what others are doing. Facebook Group here
Lemon Tree is a space where I share my real journey as I navigate motherhood, homeschooling, creativity, and building a different kind of life centered around what truly matters to me – folow me at Lemon Tree .
Happy Magical Crafting!