Spring is the perfect time for pretty desserts, colorful cupcakes, and edible floral decorations! Today we’re learning how to make beautiful royal icing flowers that are perfect for cupcakes, cookies, cakes, and Mother’s Day treats.
These flowers may look fancy, but they’re actually beginner-friendly once you learn a few simple piping techniques. Plus, you can make them ahead of time and store them for later!
Let’s get decorating!
What Is Royal Icing?
Royal icing is a smooth, sweet icing that dries hard, making it perfect for:
- Decorative flowers
- Cookie decorating
- Cupcake toppers
- Edible decorations
Once dried, the flowers easily peel off wax paper and can be added to baked treats whenever you need them.
Royal Icing Recipe
Ingredients
- 1 pound confectioners sugar
- 3 tablespoons meringue powder
- 5 tablespoons water
- 1 tablespoon corn syrup
- Pinch of salt
- 1 teaspoon clear vanilla extract
Tip: The corn syrup gives your flowers a beautiful shiny finish!
How to Make Royal Icing
- Add the confectioners sugar and meringue powder into a mixing bowl.
- Mix the water, corn syrup, salt, and vanilla together.
- Slowly add the liquid into the sugar mixture while mixing.
- Beat for about 5–7 minutes until thick peaks form.
Your icing should look fluffy and marshmallow-like when ready.
Important: Keep royal icing covered when not using it because it dries quickly!
Supplies You’ll Need
- Piping bags
- Couplers
- Wax paper
- Food coloring
- Piping tips:
- Tip 18 or 21 (open star tips)
- Tip 2D
- Tip 352 for leaves
How to Make Rosette Royal Icing Flowers
Rosettes are one of the easiest and prettiest flowers to learn!
Steps:
- Hold the piping bag at a 90-degree angle.
- Pipe a small star in the center.
- Lift slightly while continuing to squeeze.
- Pipe a “C” shape around the star.
- Stop squeezing and complete the circle.
That’s it — a beautiful rosette flower!
These flowers look adorable on:
- Cupcakes
- Cakes
- Cookies
- Dessert platters
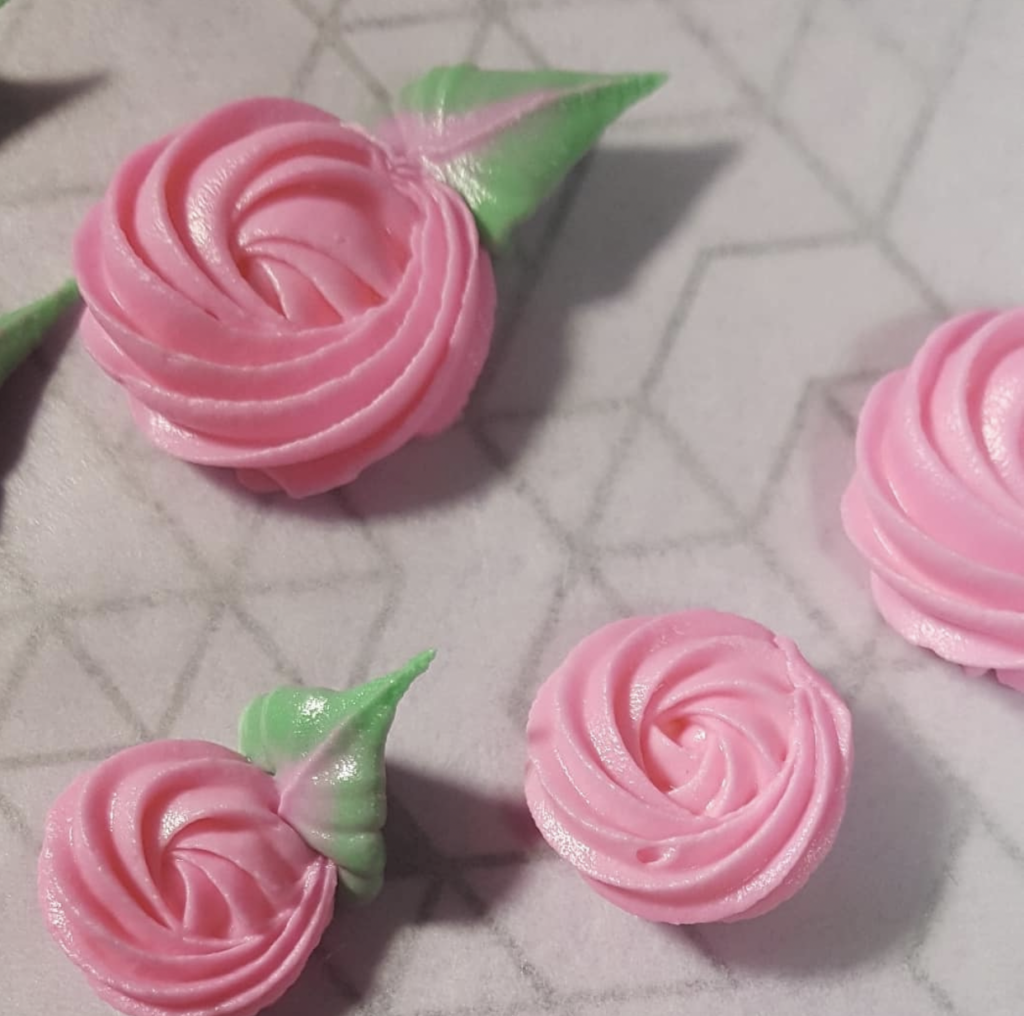
How to Make Swirl Flowers
Using a larger star tip like the 2D creates gorgeous swirl flowers.
Steps:
- Keep the piping tip touching the wax paper.
- Start with your hand positioned like a clock at 9 o’clock.
- Squeeze while turning toward 12 o’clock.
- Stop squeezing and lift.
The result is a soft, elegant flower with beautiful texture.
How to Make Royal Icing Leaves
Leaves make the flowers look extra magical!
For this step, use tip 352.
Easy Trick:
Think of the tip like Pac-Man! The open part should face forward like Pac-Man eating pellets.
Steps:
- Attach the leaf to the flower.
- Squeeze firmly at the base.
- Slowly reduce pressure while pulling away.
This creates the perfect pointed leaf shape.
You can also wiggle slightly while piping to create ruffled leaves!
Let the Flowers Dry
Leave your flowers on wax paper overnight to dry completely.
Once hardened, they peel right off and can be stored for future desserts.
Fun Ideas for Using Royal Icing Flowers
These flowers are perfect for:
- Mother’s Day cupcakes
- Spring desserts
- Tea parties
- Birthday cakes
- Cookie decorating
- Dessert gift boxes
Mix different colors and flower styles for a magical garden effect!
Final Thoughts
Royal icing flowers are such a fun way to add handmade charm to your desserts. Once you learn the basic piping motions, you can create hundreds of beautiful edible flowers in all different colors and styles.
If you make one, I’d love to see it! Make sure to join our facebook community here to share your creations and see what others are doing. Facebook Group here
Lemon Tree is a space where I share my real journey as I navigate motherhood, homeschooling, creativity, and building a different kind of life centered around what truly matters to me – folow me at Lemon Tree .
Happy decorating from My Magical Corner! ✨